The first time I saw axolotl eggs, I woke up one morning to find tiny clusters in the tank. At the time, I had so many questions: Should I keep them? How long would they take to hatch? Could I move them to a separate tank? What was I supposed to do next? Naturally, I turned to axolotl forums for answers. After hours of reading, asking questions, and doing extra research, I learned a lot about handling for axolotl eggs.
That’s why I decided to put together this guide—to save you the time and confusion I went through. Here, you’ll find the basics you need to know about axolotl eggs, from care and development to hatching. Hopefully, it will answer most of the questions you might have, just like it did for me back then. Enjoy!
How Do Axolotl Eggs Look Like?
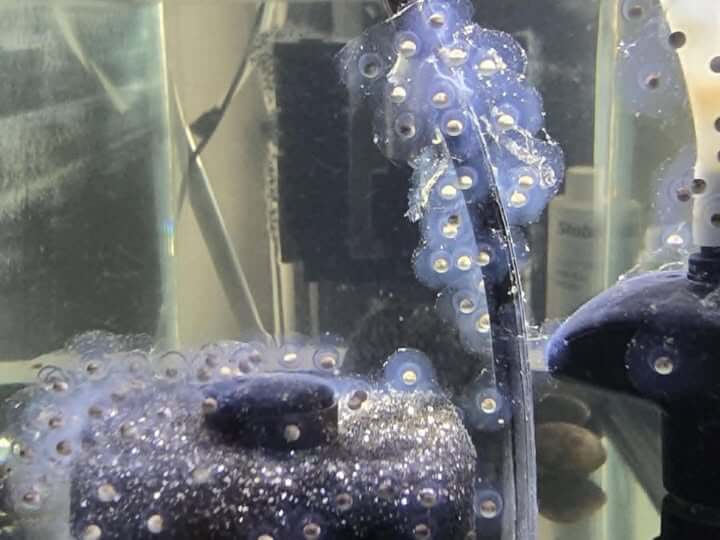
Axolotl eggs are easy to recognize once you know what to look for. Instead of being scattered loosely, the female lays them in clusters, each egg encased in a jelly-like substance that clings to plants, rocks, or tank decorations.
A single female can produce several hundred eggs over a period of one to two days, creating what looks like bunches of small, clear or golden beads suspended in slime.
The color of axolotl eggs depends on the mother’s morph. Most females lay dark brown or black eggs, but albino females produce white eggs, and coppers often lay eggs that appear more tan. Despite these differences, the eggs develop in much the same way.
At first, the eggs appear as translucent spheres, but within a few days, fertilized ones begin to show signs of life. The embryo gradually takes on a bean-like shape, then develops a tiny head, tail, and eventually feathery gills.
By the end of two to three weeks, depending on temperature and water conditions, the eggs hatch into miniature axolotls. Unfertilized eggs, on the other hand, remain as pale, shapeless blobs and never progress.
How Many Eggs Do Axolotls Lay, and How Many Survive?
Axolotls are prolific breeders, and a single female can lay anywhere from 100 to over 1,000 eggs in one spawning cycle. As mentioned above, these eggs are usually spread out in clusters across plants, rocks, and tank decorations, giving them plenty of anchor points.
For a new keeper, this can feel overwhelming—especially since raising even a handful of hatchlings requires significant care and commitment. If your goal is to keep just one or two axolotls, it’s wise to save only 20–30 eggs. This way, you’ll have enough to account for natural losses, but not so many that you risk being overrun if most of them survive.
The survival rate of axolotl eggs and larvae varies widely and depends on several factors. Healthy breeding stock produces stronger embryos, while stable tank conditions, clean water, and proper temperature are critical for successful development.
Once the eggs hatch, nutrition plays a huge role in survival; larvae need frequent, high-quality live food to thrive.
Additionally, protection from predators (including other axolotls) and consistent monitoring during the early stages greatly increase the chances of survival.
With proper care, many eggs can hatch successfully, but it’s normal for only a portion of them to reach adulthood.
How to Collect Axolotl Eggs
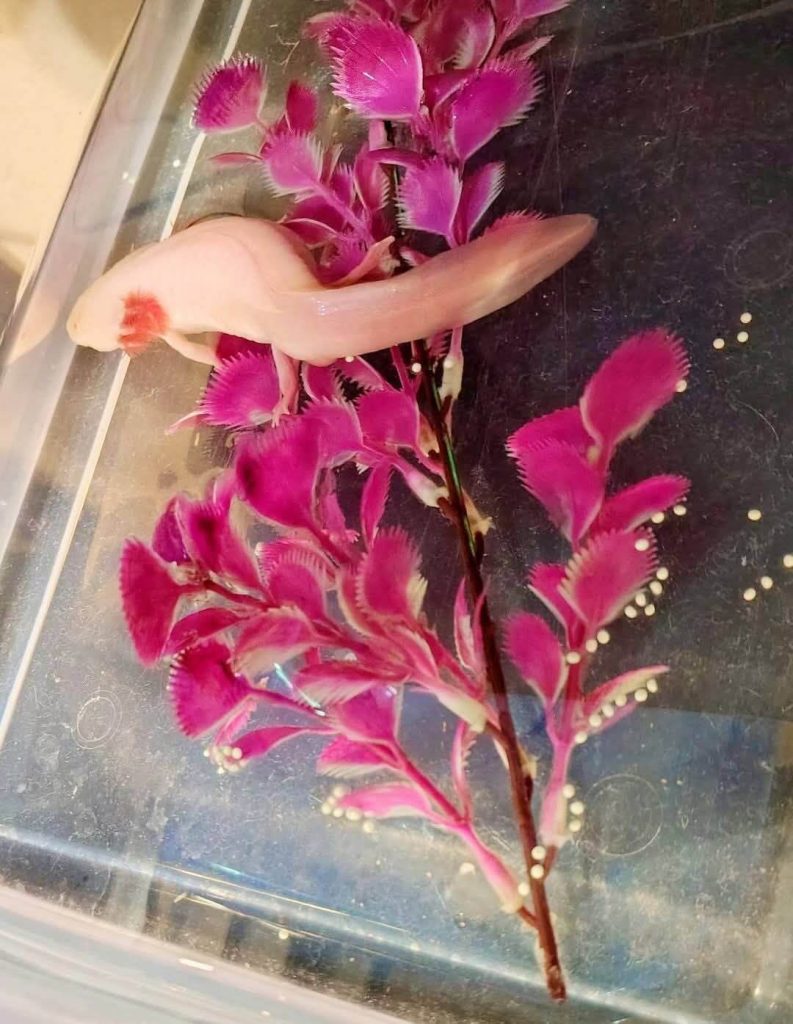
When a female axolotl lays eggs, they are usually attached to plants, decorations, or other surfaces inside the tank. The eggs are coated in a protective jelly-like substance, which makes them sturdier than they look, but they still require careful handling.
Collecting axolotl eggs can be done in several ways, and the method you choose often depends on how many eggs you plan to raise and how much space and time you can dedicate to caring for them.
A common method is using a turkey baster or feeding bulb to gently suck up the eggs and transfer them into a separate container. Alternatively, you can carefully use your fingers to detach the eggs by breaking the connection point between the jelly coating and the surface they are attached to.
Because the eggs are fairly durable, this can be done by gently scraping them off with your fingernail or a thin blade—just avoid applying pressure directly on the eggs themselves. If possible, consider leaving the eggs attached until hatching, as this reduces stress and handling.
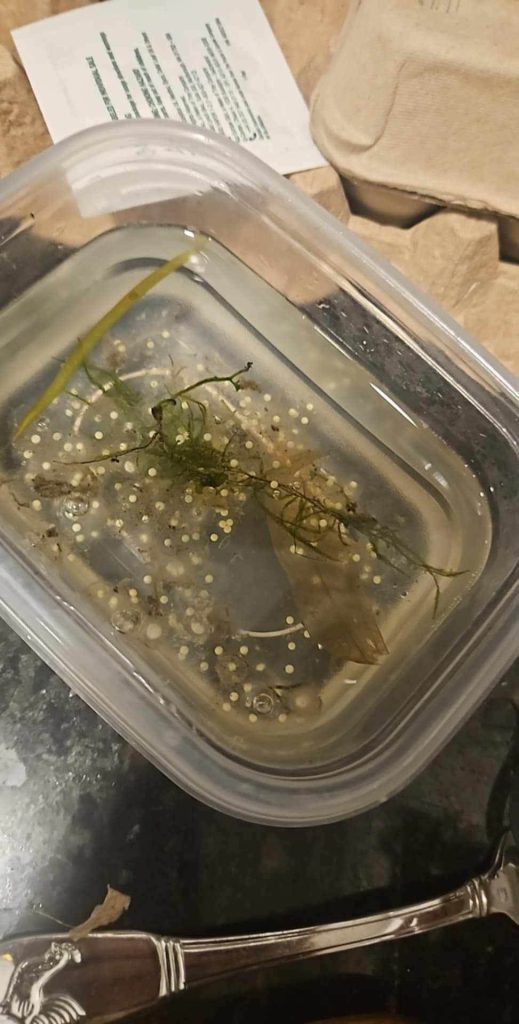
Once collected, eggs should be placed in a dedicated rearing setup. Many hobbyists use a 5-gallon tank with a sponge filter, keeping the water just high enough to cover the filter.
Clean, cool, and well-oxygenated water is essential for healthy development, so water changes every few days are recommended. Warmer water may cause premature hatching, so maintaining a temperature around 18–20°C (64–68°F) is ideal.
To prevent fungal growth, consider using mild preventative measures such as ensuring the eggs don’t clump too closely together.
It’s important to plan ahead when collecting axolotl eggs. A single female can lay hundreds, sometimes close to 1,000, which can quickly overwhelm even experienced keepers. Raising axolotl larvae requires frequent water changes, live food cultures (such as baby brine shrimp or daphnia), and individual attention.
Because survival rates can be higher than expected, it’s wise to only collect 10–30 eggs if you are a beginner. This number is much easier to manage, and you can always acquire more eggs later if you are ready for the commitment.
Lastly, ethical considerations are key. If you do not know the lineage of the parents, or if you cannot guarantee homes for the offspring, it is best to cull the eggs early to avoid passing along genetic defects or contributing to overcrowding. This is typically done by freezing the eggs for a few days before discarding or burying them. While this may sound harsh, it ensures that only strong, healthy axolotls are raised and prevents unnecessary suffering.
How to Tell if Axolotl Eggs Are Fertilized
When axolotls breed, the majority of the eggs laid are usually fertile—but not every egg will develop. Thankfully, it’s fairly easy to tell which ones are viable within just a few days.
At first, all eggs look like small, round jelly spheres. Fertilized eggs quickly begin to change shape, transforming from a simple blob into a more elongated, kidney-bean form.
Within a few days, a visible head and tail become apparent, often with a golden or slightly cloudy tint. As the embryo grows, you may also notice feathery gills starting to form and, in some cases, slight movements within the egg. These are clear signs that the embryo is alive and developing properly.
In contrast, unfertilized eggs remain unchanged—they stay as round, white or cloudy blobs without any internal structure. Over time, some may turn fuzzy or opaque, but unlike fish eggs, axolotl eggs do not usually rot or foul the water, thanks to their protective outer casing. This means they can often be left alone without harming the viable embryos, although some breeders prefer to remove them for clarity.
Other clues can also help: fertilized eggs often clump together due to their sticky membranes, while unfertilized ones are more likely to remain separate. With experience, breeders can also spot the tiny white dot of an embryo on the surface of a fertilized egg just hours after fertilization—a subtle but reliable early indicator.
By monitoring these changes, you can quickly distinguish healthy, developing embryos from infertile eggs. Proper water conditions, stable temperatures, and good care will give fertilized eggs the best chance of hatching into healthy larvae within 2–3 weeks.
How to Tell if Axolotl Eggs Are Dead
Not every axolotl egg will survive, and it’s important to know how to spot the ones that aren’t developing so you can remove them before they affect the rest of the clutch.
Dead eggs usually turn white, opaque, or cloudy instead of remaining clear or golden. In many cases, they swell, take on a fuzzy or moldy appearance, and may even sink to the bottom or float on the water’s surface.
Unlike healthy eggs, which gradually shift from a round shape into a bean-like embryo with a visible head and tail, dead or infertile eggs stay as solid, round blobs with no change over time.
If you’re unsure, you can gently inspect them: viable eggs feel firm and resilient, while dead ones often become soft or mushy.
It’s normal for some eggs to die during incubation, but if a large portion of the clutch shows these signs, it may point to poor water quality, unstable temperatures, or other environmental issues in the breeding setup.
For the health of the remaining embryos, remove dead eggs as soon as possible. They can be frozen before disposal, flushed, or discarded in another safe way. By keeping the tank clear of decaying eggs, you give the surviving embryos the best chance of developing into healthy larvae.
Hatching Time: How Long Does It Take for Axolotl Eggs to Hatch?
Axolotl eggs usually hatch within 2–3 weeks (14–21 days). The exact timing depends mostly on water temperature:
- Warmer water (around 18–20°C / 64–68°F) → eggs hatch closer to 14 days.
- Cooler water → hatching may take the full 3 weeks or a little longer.
Once the embryos inside the eggs begin to show the familiar bean shape, you can expect hatching within the next couple of weeks. Most of the eggs will hatch on their own, though occasionally a few may lag behind.
Axolotl Egg Development Stages
Watching axolotl eggs develop is fascinating, as you can see clear changes almost every day. Here’s a general timeline of what to expect:
| Day/Stage | What Happens |
|---|---|
| Day 1–3 | Freshly laid eggs look like small blobs surrounded by jelly. They stay mostly unchanged but may collect bits of dirt. |
| Day 5–6 | Embryos begin to “bean,” taking on a curved bean shape. Gill buds start to appear. |
| Day 8–9 | Embryos look more like tadpoles. They begin twitching and changing position inside the egg. |
| Day 12–14 | Pigmentation becomes visible (wildtype darkens, albino stays pale). Eggs begin hatching, leaving behind deflated sacs. |
| Hatchlings | Newly hatched larvae have gills but no legs yet. They are camouflaged against their surroundings. |
| 4 Weeks Old | Hatchlings grow back legs. Some natural losses may occur, but healthy babies continue developing. |
Axolotl Egg Care Routine
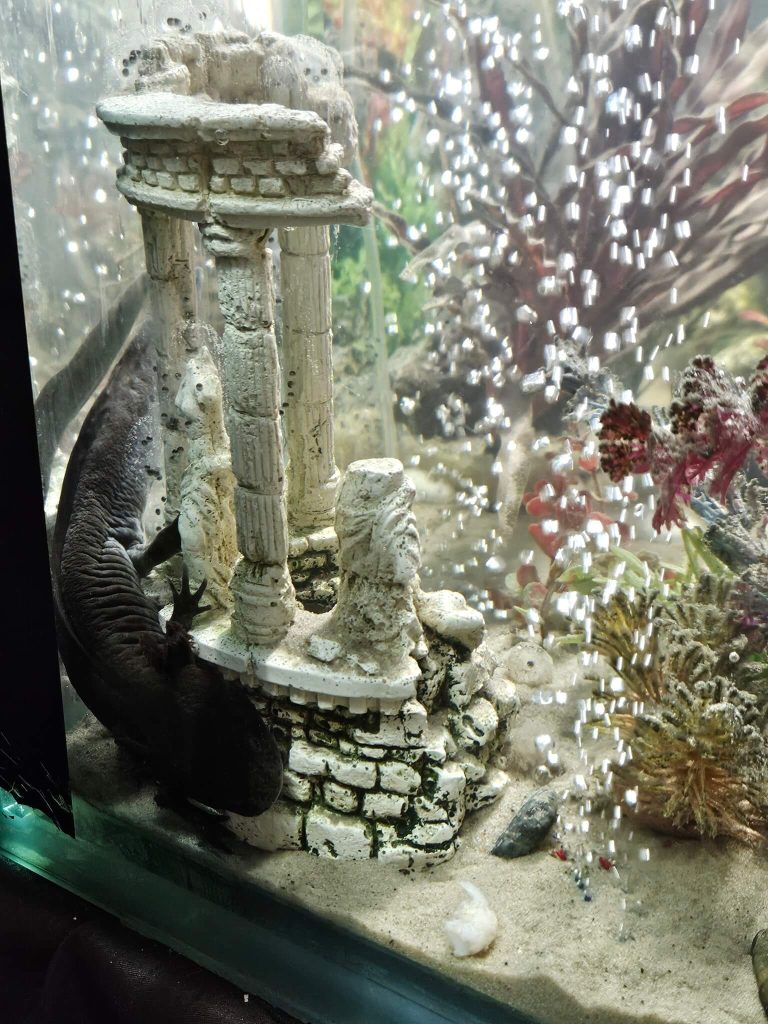
Caring for axolotl eggs begins the moment you discover them. Spawning often happens suddenly, and it’s not unusual to walk past your tank one day and find clusters of eggs stuck to plants, rocks, or decorations.
A female can lay hundreds of eggs at once, so knowing how to handle them properly is key to ensuring healthy development.
I. Initial Care and Relocation
When you find axolotl eggs, you have two choices: either leave them in the main tank and move the adults, or carefully transfer the eggs to a separate container. Many beginners prefer the first option, but eggs are quite resilient thanks to their protective jelly coating and can usually be moved without issue.
If eggs are attached to plants, the easiest method is to move the entire plant into a separate rearing tank. If they are stuck to rocks or glass, you can gently scrape them off at the point of attachment with a fingernail or thin blade, taking care not to squeeze the eggs.
II. Water Conditions and Setup
The best environment for eggs is a small tank or container filled with clean, conditioned water. Avoid thin plastic containers, which can leach toxins harmful to embryos.
A 5-gallon glass or acrylic tank works well, and water should be kept cool and stable around 18–20°C (64–68°F).
Warmer water may speed up development but can also cause deformities or premature hatching.
A gentle sponge filter or occasional low-output airstone can improve water quality and oxygenation, but avoid strong currents that disturb the eggs.
Perform partial water changes daily (about 30–50%) to keep the environment clean and free of debris.
III. Monitoring Development
As eggs develop, check them regularly. Viable eggs will gradually change shape, with embryos curling into a bean shape and eventually showing a head, tail, and tiny gill buds.
Dead or undeveloped eggs turn opaque, white, or fuzzy and should be removed immediately to prevent fungus from spreading. This can be done by carefully cutting through the jelly strands with clean tools.
IV. Encouraging Hatching
Eggs usually hatch in 2–3 weeks, depending on temperature. As hatching time approaches, embryos may twitch inside their capsules.
Gentle warmth and exposure to natural light can sometimes encourage reluctant eggs to hatch, but avoid placing them in direct sunlight for too long, as overheating can be fatal.
Once hatchlings emerge, remove them from the egg casings and transfer them to clean containers or tanks to avoid fouling.
V. Post-Hatching Care
Newly hatched axolotls are tiny, fragile, and cannot survive without food for long. Their first meals are usually live foods such as daphnia or baby brine shrimp, which provide the movement needed to trigger a feeding response.
As they grow, gradually introduce larger foods like chopped bloodworms. Regularly separate bigger larvae from smaller ones to prevent competition and ensure even growth. Over time, juveniles can be transitioned onto prepared foods such as pellets.
VI. Managing Numbers
It is important to realistically consider how many eggs you can raise. While it may be tempting to keep every egg, caring for hundreds of hatchlings quickly becomes overwhelming.
A more manageable approach is to start with 10–30 eggs, especially if this is your first breeding attempt. This ensures you can provide high-quality care and still have the capacity to rehome them responsibly.